Friday, May 27, 2011

High Waters

Our sleepy little hometown is currently in a State of Emergency as rain water, along with spring runoff has burst the banks of the river.  We are not foreign to floods in this area but it never looses its sense of excitement, worry, loss, and a community pulling together to help one another.


(taken from my man's iphone)
 My man is serving in the front ranks of battle sandbagging, moving equipment, evacuating, pumping, etc.  Oh how I long to be there in the action, helping out.  Today my job is keeping our children warm and dry, safe from any harm, and making sure our little abode stays dry during this heavy rainfall.  One never knows how your landscape will react to heavy rainfall when not even a year ago it went through some major upheaval to make room for our home.  So far only some really good settling. 

Wednesday, May 18, 2011

Outdoors Progress Report

In case you have been wondering what I have been so busy working on outside I thought I would give you a little update on some of the outdoor projects. 

You may remember about the rocks we were having delivered mother's day weekend.  We are still working on this project but it is coming along beautifully. 


This is the picture I shared before we began our transformation.  Take note of that awkward slope under the deck on the right side of the photo.

The first stages of the project.  Yes we are doing it ourselves but not without some heavy equipment (thanks to the company my husband works for - a construction framing company) to help lift these heavy beasts.


This is where we are at in the project right now.  You can see we are halfway done with the steps.  The wall will stay about this height (of course levelled out) and the steps will turn and continue up the rest of the slope.


The long term plan is for the flat area underneath the deck and the whole length of the wall to be completed as a flag stone patio and an outdoor kitchen.  Not this year though.


We also moved this beautiful shipping container.  We purchased this container to store much of our belongings while we were in between houses.  You can see it has been parked along side the driveway in the front of the house.  I'm sorry that I don't have a better photo of how it sat in front of the house.  Not pretty.


Well, we finally got it moved.  This is not recommended.  Next time we will be sure to hire a crane.


And now it sits in the back corner of our property waiting to be painted and beautified by moi, hopefully sometime in June.  It is being used to store quads, yard tools, etc.

All the stakes you see in the ground in front of the container are my garden.  I picked a spot in our yard (used to be pasture), and rotor-tilled, and rotor-tilled, and rotor-tilled until I was able to get some seeds in the ground.  The manure from its previous life as a pasture should help out.  My plans include building a storage shed/kids outdoor play house, a cute fence, and some flower beds around the perimeter.  But again, not this year.  The list is already full for the year.


And here is an early picture of our front entrance.  You will notice the cut ends of the timbers are still unstained, and the shadow batons in the gable are just primed.


Another coat of stain for the timbers, and paint for the shadow batons.  The bed on the left of the door has also been filled with top soil so I can now begin filling this bed with shrubs and perennials.  I even learned to drive the bobcat because my original method of shovelling trailers of dirt and then emptying them is far too time consuming, and labor intensive.


So there you have it. I'm getting a free suntan and workout all while turning our little piece of pasture into a yard.

Tuesday, May 17, 2011

Ikea Desk transformation finally complete!!

I finally finished my Ikea desk transformation that I have been working on for far too long.  I haven't really put a ton of hours into it but the nice weather we have been enjoying has pushed this project to the back burner.  Here it is.


And this is what it used to look like.


You can see my inspiration for my desk in this post.

What I did to achieve this transformation:
I took this stack of walnut off-cuts from my Dad's woodworking.


Then I glued them down on a sheet of mdf cut to the size of my desk.  You can read a little on this process here and here.

Then sanded and sanded and sanded some more.  Added 5 coats of a tung oil, linseed oil, spar urethane, and varnish mixture.  And glued it onto my desk (after I had ruffed the desk up a bit with 120 grit sandpaper).

Then the painting began.  One coat of Benjamin Moore's Fresh Start Primer and three coats of Cabinet Coat in Timid White.  Finished with one coat of the same mixture as above for good measure.

I removed the metal leg and sprayed it with Rustoleum's metallic spray paint for a shiny metal finish rather than the flat finish on the leg originally.  I also sprayed some brass lion pulls in the same metallic paint and attached them to the drawers.  Some of the options I considered for the metal you can read about here. 


 A better view of the slats on the top.


The Lion pulls I picked up from Home Depot and sprayed.


Now I am on the hunt for the perfect office chair to compliment my desk, some great drapes for this room and a little more wood for the shelving I plan to build for my office/music room.

Linking this project to:

Type A Decorating                  Thrifty Decor Chick         The DIY Showoff        WOW Us Wednesdays
Swing Into Spring                Wicked Awesome Wednesday       Creative Share Wednesdays
Workshop Wednesday        Simply Creations           Frugalicious Friday       Remodelaholics Anonymous
Flaunt it Friday

Friday, May 13, 2011

Metal Choices.

I can't believe its Friday already.  Where did the week go?  I have been busy out in the yard making good use of this BEAUTIFUL weather we have had this week.  I am making some headway on my office desk.  I am doing some of the final finishing but have come to another decision making stop. 

I haven't decided what metal color I want to go with for the one leg and knobs for the drawers.


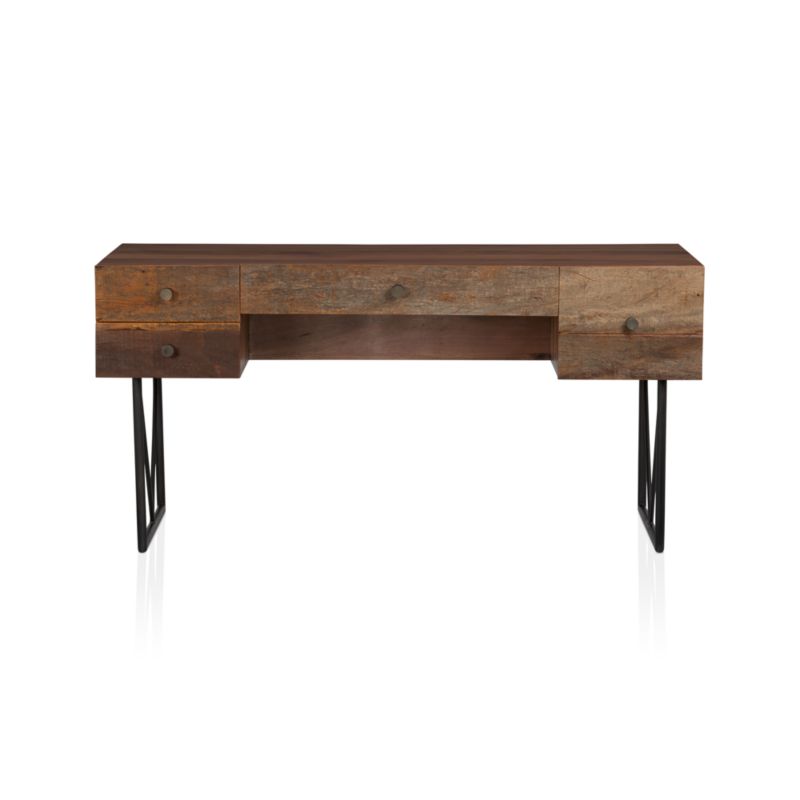
Here is the original desk.  Do you see the metal support on the left side?  Some of the options I am considering are:
(http://www.crateandbarrel.com/)
  • oil rubbed bronze (like this original inspirational photo)


(http://www.jonathanadler.com/)

  • Or perhaps a little more Jonathan Adler style with mirrored like metal.
What do you think?

Wednesday, May 4, 2011

Changing it up in the Boys Bedroom

There are two reasons why we changed the boys room around. 
1. Our 2 year old wakes up with the sun.  This was fine in the winter when the sun wasn't getting up at 5:30 a.m. Now that Mr. Sun is showing his cheery face so early we are not so keen on our own Mr. G showing his face so early.  We all know what a 2 yr old with a lack of sleep is like.  Thus, we needed to add some curtains to this room.  It already has blinds but they are sheer weave so we can still take in the view when they are closed and their main purpose is to block out some of the heat.
2. Our oldest (who sleeps on the top bunk) has been asking to take the beds apart for a while.  I guess the bunk bed novelty has worn off.  He has been sleeping on the top bunk for about 2 1/2 years now.

Here is the bedroom all three of the kids shared in our old house.  It was designed for a community more geared towards families with teenagers, or retired so therefore this is the only other room on the main floor other than the master bedroom.  It is a large sunny den/office. 


I secretly miss this room.  Hardwood floors for a bedroom.  That white wall you see is a brick paneled wall (loved it).  Someday I will duplicate it in this new house.  Simple unisex decor.  All 3 kiddos all in one place (sometimes bedtime was party time but it always made you smile to hear them giggling).


This is what the bedroom looked like in our new house before we switched it around a bit.


You can see in the photo below that with the bookshelf, and dresser by the windows there was no room for the addition of curtains without completely overcrowding the space.


Here is their re-arranged space.
I am looking for some inspiration for what to put over each bed.  Any ideas?


And the new curtains.  I just picked them up at wal-mart as they were cheaper than making my own, and someday I might jazz them up a bit.


We had to move the dresser into the closet in order to fit both beds comfortably.


So what do you think?  Good move or not?  Any ideas of what to put above each bed?

Tuesday, May 3, 2011

Piano Bench Complete!

One project off the list. 


I completed my new piano bench last night and I am completely thrilled with how it turned out.  I made it from scratch!!!!  If you missed my original post stating the reasons why I wanted to change the bench and some inspirational photos you can see that here.


Here is the original bench that I found out my dad did not make (just fixed multiple times), but my mom did do the needlepoint on top.

If you want to find out how
+
+
=

Click on Read More for all the details.

Monday, May 2, 2011

Old Projects, New Projects

I'm Back.  I had a wonderful easter week with my kids but I am glad to be back into routine and I am hoping to finish up a few projects this week.  Although my current office desk, and piano bench projects were calling at me all week I spent very little time working on them as I stayed very dedicated to the kids.  They (the projects) are coming along nicely though and I am hoping to have at least one of them completed before the end of the week.  But, just because my hands were not working on projects doesn't mean my head wasn't. 

I have been on the hunt for the prefect rustic modern center piece for our table for some time now.  I repainted the vases that currently sit there for the meantime.  However, it was always my intention to replace them with a very large wood bowl. 

I still haven't come across a wood bowl large enough for the space (my table is 65" square), and the ones I have come across run at about $500.  Way out of my price range and still not quite large enough.  I started experimenting with a few items I have at home and I think I have come up with a solution.   I even have a source for the materials I need and it will only run me about $20-$50.  The only hitch is that I will have to collect the materials from a small town (not on my usual route), and the business is run by one man who is frequently not actually on site.  I am hoping to possibly catch up with him at some point this week so I can add this project to my list.  Until I can show a few more details of that project here is an inspirational photo for you.

http://www.clodagh.com/

Of course I am not builing this table as I already have a functional one and the walnut plank of this one would cost a large fortune.  I am working on incorporating this idea into my tablescape.