
Thursday, March 17, 2011
Tour my Home
I have now added a new page where you can have a brief tour of our home. Check back regularly as I will continually update this pages as I make changes in our home and add more of our spaces. Click on 'My Home' page to begin your tour. I'd love to hear your comments and ideas as well.
Pantry organization
So we'd all like to open our door to a neatly organized, color coordinated pantry but how do we acheive this with all the different sized boxes and cans that the assortment of food we stock comes in? If you are one of those people who bring your groceries home and take them out of their boxes and transfer them to some beautiful, matching, stacking, perfect containers, I am totally envious. I love that look. However, in my house coming home with armloads of groceries for our family of five, with three little tikes in tow is a task in itself. Getting all the groceries put away is a miracle. Transfering them to pretty containers is not an option.

Instead I corralled all the spare baskets I could find around the house. I then created some slim wood plaques, (you can pick up small, thin, craft wood at Michaels that can be cut with a utility knife) painted them with chalkboard paint and hot glued them onto my baskets. Now I can tuck all those mismatched, unsightly food containers into the baskets and I am still left with a tidy organized look. The best part, I can mark what is in the baskets on the little chalkboards and my husband can even find things in the pantry!!

Here is an example of the inside of one of the baskets.


Wednesday, March 16, 2011
Ikea Expedit reworked.
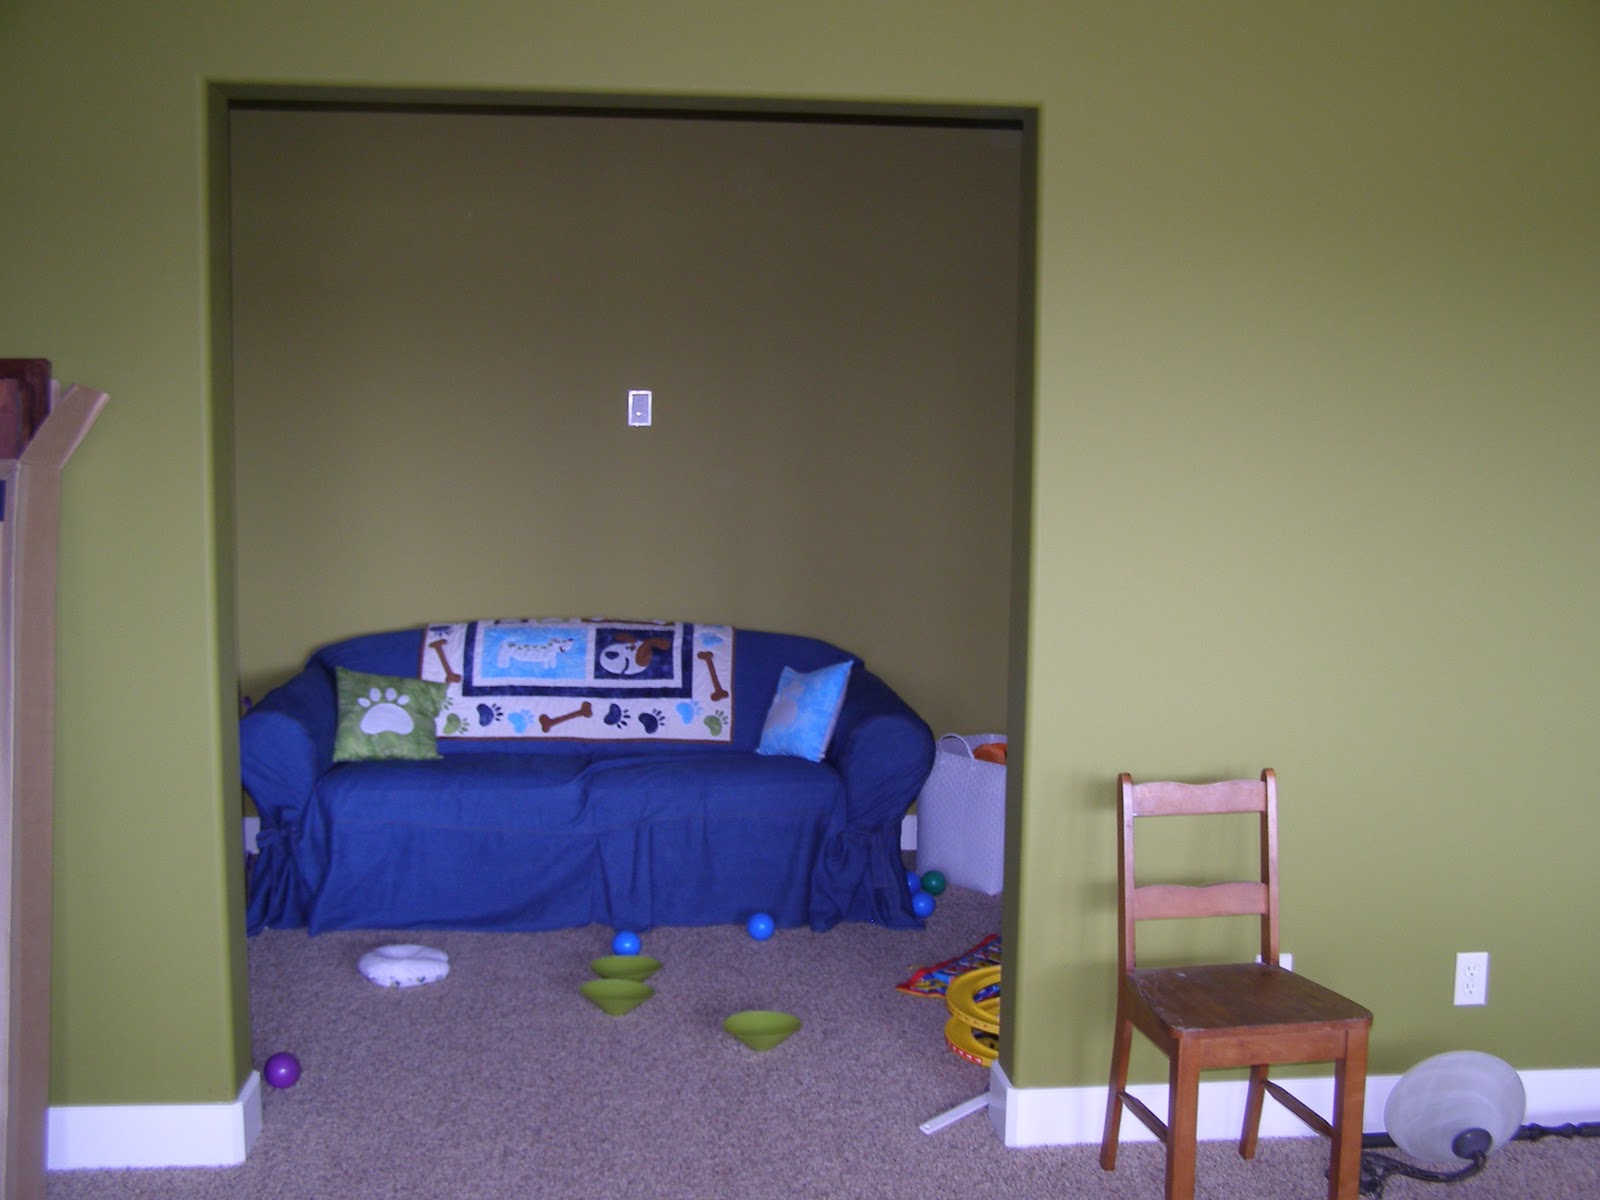
So I set out to create a great floating display of my childrens art and some great quotes in their play room today. I quickly taped up a few sheets of blank paper to see what arrangement would work best and ran into a road block. With the window opening in this wall of the playroom I could not get the hide-a-bed and picture arrangement to balance at all to my liking. The opening in the wall was created so the kids would feel like they were still in the area we are yet still be a little seperate so we could have quiet conversation.

The other wall in their playroom is filled with this large expedit Ikea shelf. It is the only wall in the playroom that this shelf will fit along. I have been cursing the huge size of this unit for a while so I decided to do something about it.

I taped off on my window wall how the shelf would fit if I downsized it one row.
I decided this arrangement would work better for me so I got to work.

First I disassembled the unit removing the top and bottom frame as these would be the ones I would have to cut down. The other middle shelves could easily be removed as they are all individual.

I then used my heat gun (an iron or hot blow dryer would work as well) to remove the veneer on one end of each the top and bottom frame.

Off to visit my mom and dad I went to use their table saw to cut these parts of the frame down 13 3/4". At this point I forgot my camera.

Here we are back at home with our cut down frame and the veneer glued back on ready to assemble again.

And here is the trimmed down shelf in its new location.

Now I can continue with my kids art display. I have some other great ideas for cushions for this couch and display above the shelf that I will hopefully get to soon. You can also see on the very right side of this photo the entry to a toy storage closet that we converted into an indoor playroom. More to come on that soon.
Tuesday, March 15, 2011
Craft Closet Details
On our house plan my craft room in our walk-out basement started out as a nice roomy area just off of a large games area and family room. When we built our house we used insulated concrete forms (icf) so therefore all our exterior walls in our basement and main floor are 12" of concrete. The only downfall of this system is that plumbing pipes cannot be run inside the wall as a traditional wood wall so therefore all our plumbing pipes heading out to our septic system needed their own space. My craft room got elected for this by the plumbers and electricians so therefore I lost a lot of square feet and am left with basically an oversized walk-in closet with one small window. Eventually when are children are older there will be plenty of spaces for me to take over but for now I am making the most of my craft closet.

Some of my priorities for this space included being able to look out of the room to my children playing in the games area, storage for my supplies, and floor space for my son to be able to set up his train beside me as I am working. Otherwise he ends up trying to be right on top of my projects.

Here is my current sewing desk in its old home. This was originally a skinny dresser that we added osb sheeting to in order to create more depth as a desk.

The sheeting was sealed with gloss tile sealer, only because that is what I had available, but it gave the surface a smooth shiny appearance and sealed all loose chips so I do not snag any delicate projects.

I repainted the frame of the dresser a dark grey brown, and the drawers a creamy white. I also removed 4 of the drawers to make room for these great baskets that store the beloved train set for easy access and my projects in the works.

On the right wall we raised the shelving to leave enough floor space for our little engineer. The black boxes hold all different materials and are labeled appropriately.

These deer horns were found on our property so I gave them a light sand and painted them the same creamy white as the drawers.

My inspiriation board and mail sorter were thrift store finds. I simply filled the large frame with cardboard and covered with fabric so I can easily post and remove ideas as I come across them.

In order to keep all my notions handy as I am sewing I placed inexpensive plastic storage carts underneath the desk so they are out of sight but within easy reach.

Here is another reason why I wanted my desk to face out rather than against the wall. On cold winter days I can warm up and enjoy watching the fire dance in the fireplace across the room.
Monday, March 14, 2011
Overall wall stencil

Saturday, March 12, 2011
Introduction and Slipcover Redo!
Maybe I should do a little introduction of myself before I start with this post.
In October of 2010 my husband and I and our 3 kids moved into our new house that we built on an acreage. When I say built I mean we were our very own general contractors for the project and did quite a bit of the work ourselves. I might detail more on that later. However, it has always been our dream to raise our family on an acreage and we have finally made that jump. The only draw back is that now that we have built our beautiful house out of town it has left little money for decorating. I have decided to share my attempts at decorating and organizing my house without spending a lot of cash.
Without further ado here is a hide-a-bed couch we received from a great Aunt Ethel years ago that I have not been able to get rid of because it is in great condition and has served itself useful in providing a bed for those times when we have had more guests that we have had beds.
This is a photo of the couch in our old house. Underneath the slipcover is pale, hospital green, upholstery. The denim slipcover worked for a while, however, it definitely does not suit our new house.
Alternative 1: Bleach
Alternative 2: Buy a new one to the tune of at least $85.
I received great warning about how bleach usually leaves your item blotchy colored and can even eat holes through the fibers.
What did I have to lose though? I didn't like it in the first place.
Cost: $3.69 x 2 vs. $85 min.
2 bottles of bleach later I am loving the results. The color is completely uniform. There is not a spot of the original blue denim left and I am left with this great creamy slipcover for a plain backdrop to the rest of the playroom. There are not even any holes.
Product used: Javex 'fiber guard'

Stay tuned for more photos of the playroom as it progresses. We have also created a great indoor playhouse in the closet off the playroom using leftover building materials. More posts on that to come as well.

Friday, March 11, 2011
Spring Organizing!
It must be in the air. We are not seeing too many signs of spring outside here in Southern Alberta yet but they are definately showing up inside my house. I tackled another problem area today and I am loving the results.


Here is my phone desk between my kitchen and living area. I like to be very organized and usually have things tucked away in cupboards and drawers however, there are a few things I need left out for the visual reminder to do them. The chalkboard canvas is my reminder to work on our letter of the day with my 3 yr old. I have it displayed on a plate holder and am okay with how it looks. The other mass of books is my reminder to do reading with my 7 yr old. He shows some signs of dislexia so with lots of reading we are hoping to overcome this obstacle. This means having a variety of books on hand for any free moment. The binoculars are a necessity for my husband (so he claims) as we live on an acreage and he is constantly watching any wildlife in the area.

Here is my tidy desk area now with the great upcycled fabric buckets I created using men's suiting and some new cotton.

I love how they turned out so I made a few more and added them to my shop. Keep watching my shop as I plan to add some other colors.

And Yup. They are even reversible. I can now change up the look with the seasons or my whims.

Subscribe to:
Posts (Atom)